With the progress of imitation technology, there are more and more counterfeit Rolex watches in the market. Take a look at the two popular GMT watches and we will share six tips on how to tell a fake Rolex from a real one:
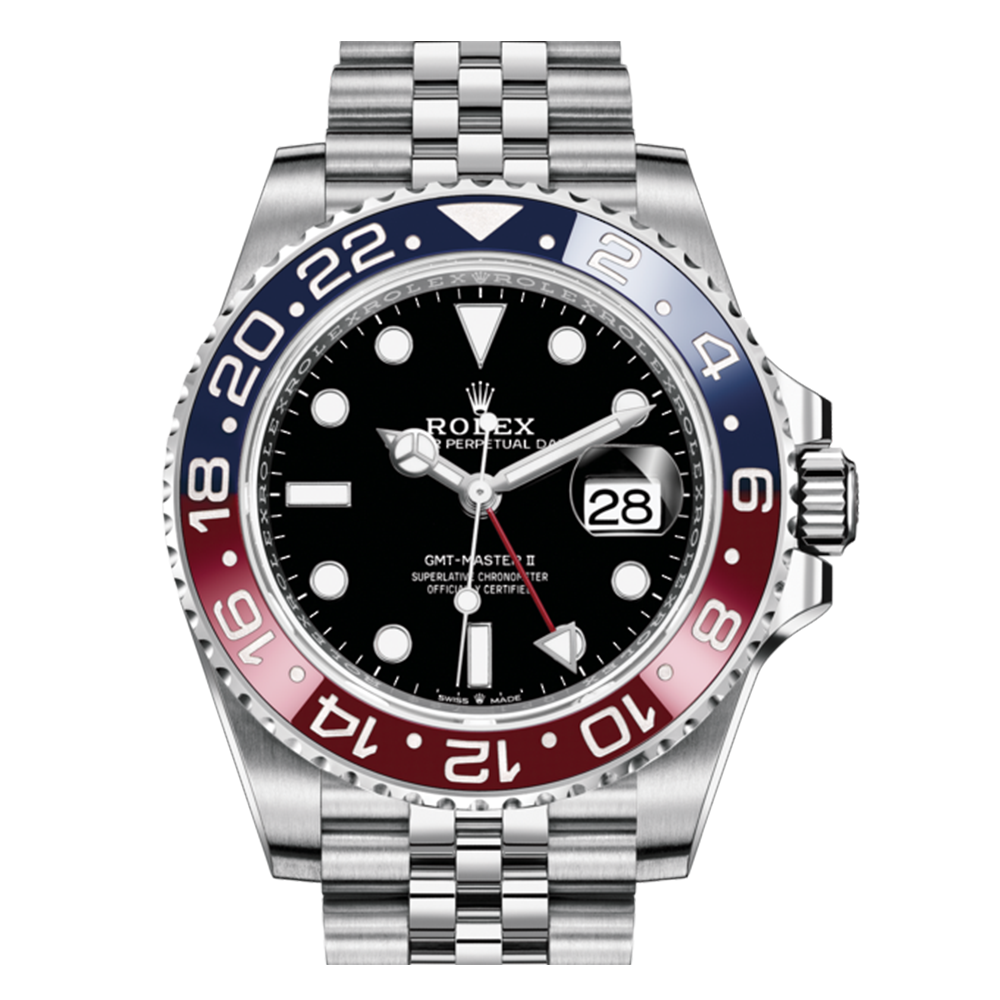 126710BLRO
 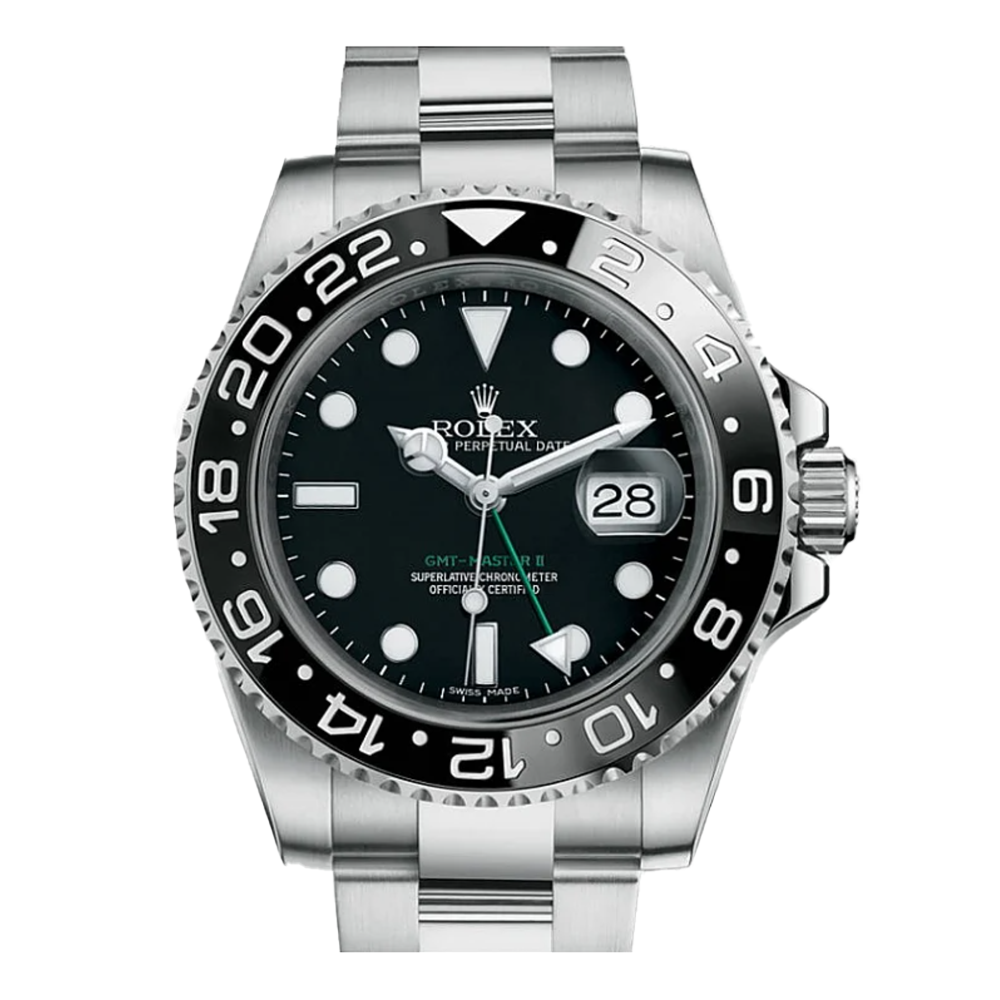 116710LN (Green dial)
【1st Tip】Check the guarantee card
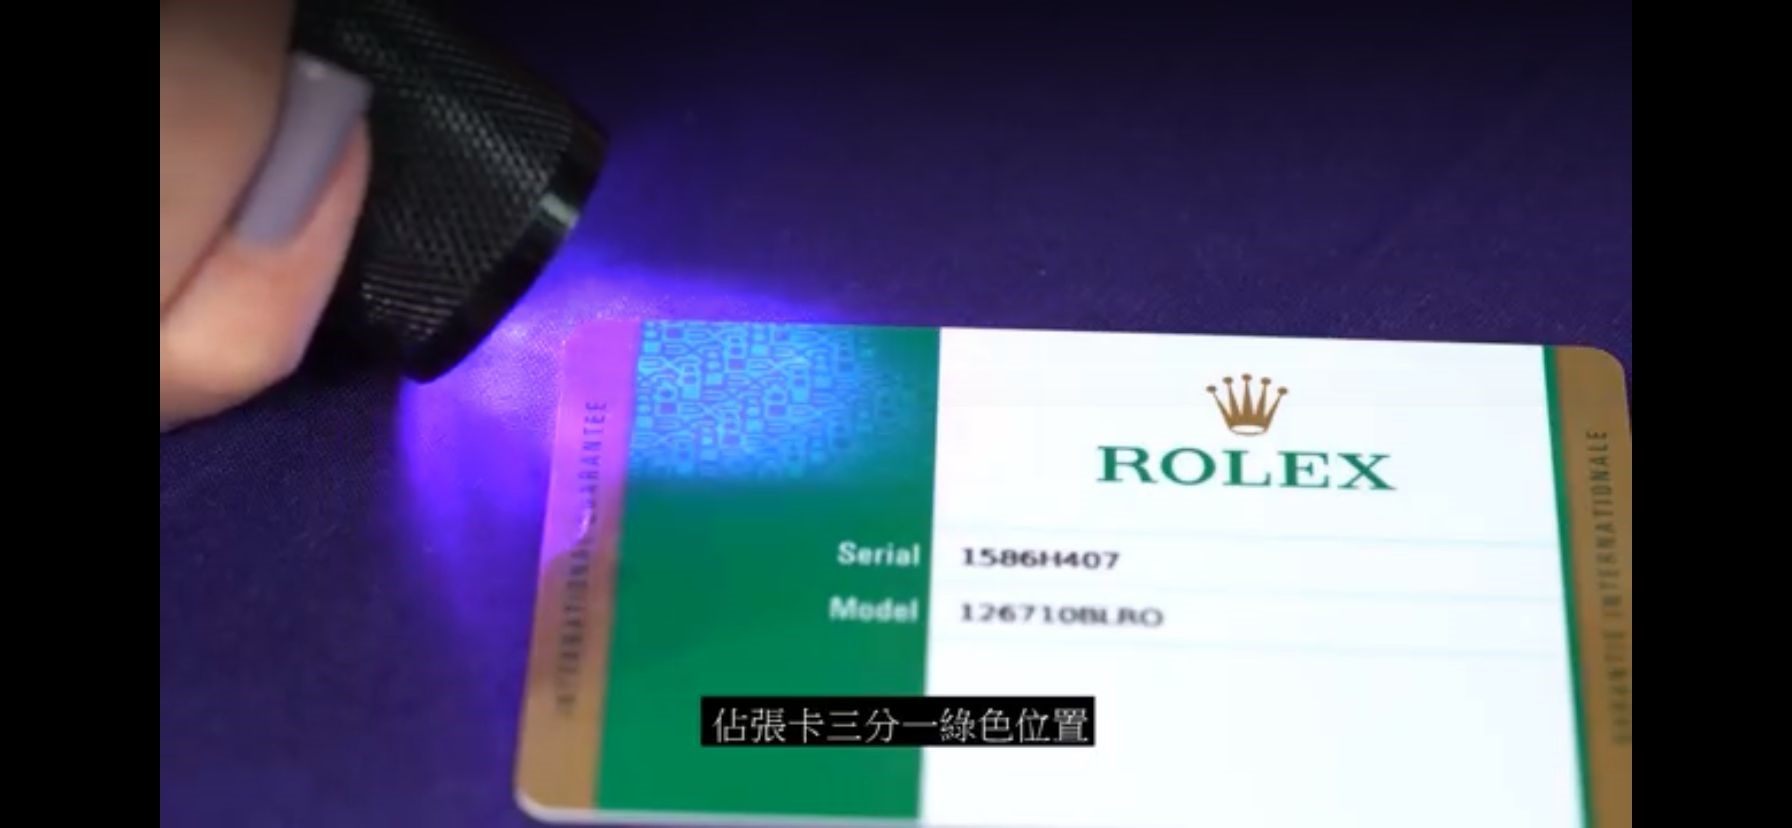
What's so special about the Rolex guarantee card? It seems just a piece of greenness on the left side of the card. You might use an ultraviolet light lamp. Rolex Monograms will only appear (see Figure 1) under ultraviolet light, which occupy one third of the green part.
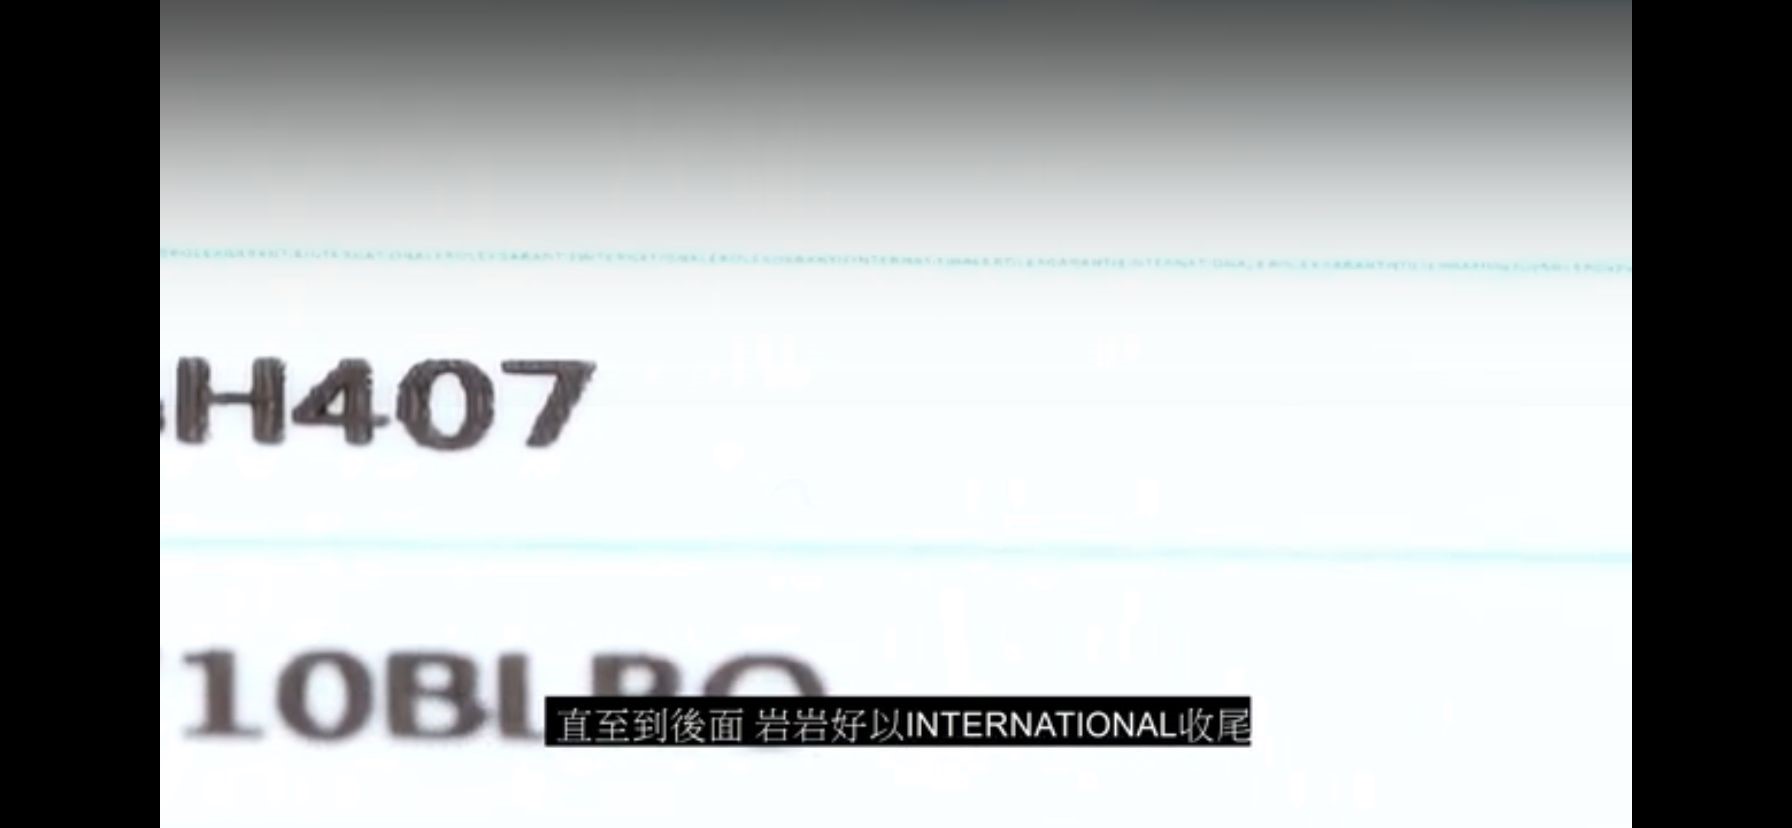
There are three lines on the front of the card to separate the serial and model number. If you look carefully, they are not ordinary lines! They are actually made up of tiny English letters “Rolex Guarantee International" (see Figure 2), and end with the word "International"!
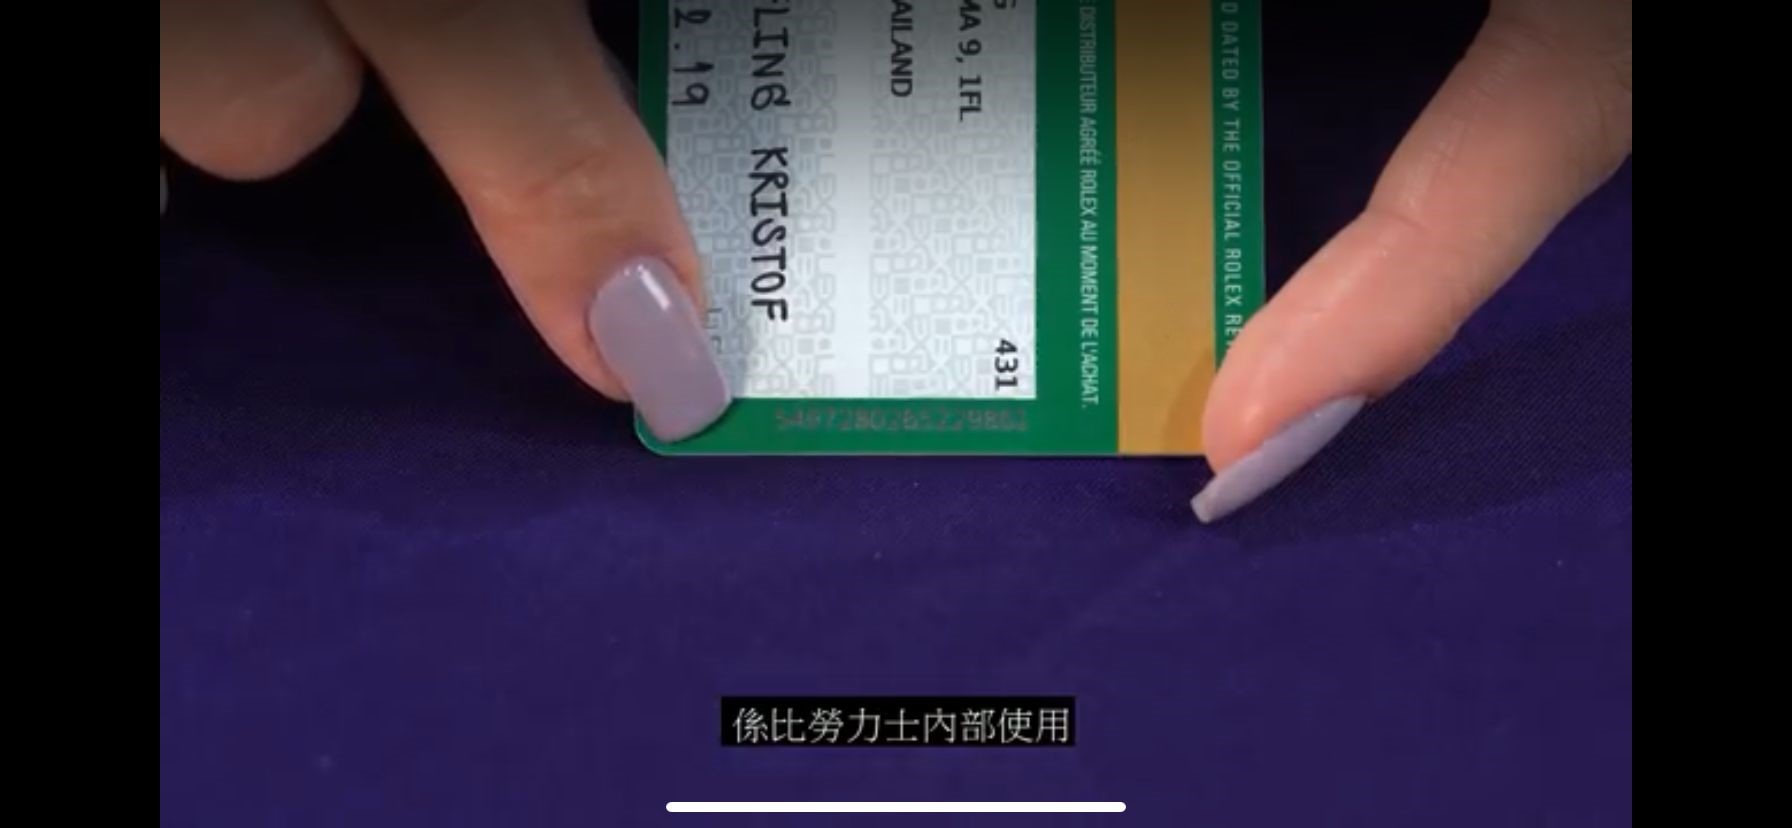
There is also a magnetic data tape at the back of the card. A row of laser numbers are printed at the end of the magnetic data tape for internal use (see Figure 3).
【2nd Tip】Correspond the “inner engraving”
After confirming the authenticity of the warranty card, let's take a look at the “inner engraving” of Rolex. The serial number is not only printed on the card, but also engraved at the 6:00 position along the inner bezel under the crystal. Please make sure the two are the same when purchasing Rolex!
Take this watch for example, with serial number “1586H407” (see Figure 4), which is the same as the serial number of the warranty card. At the 12:00 position of the inner bezel, you will see a crown, which is the Rolex logo. The crown has five dots on top, and an oval circle at the bottom.
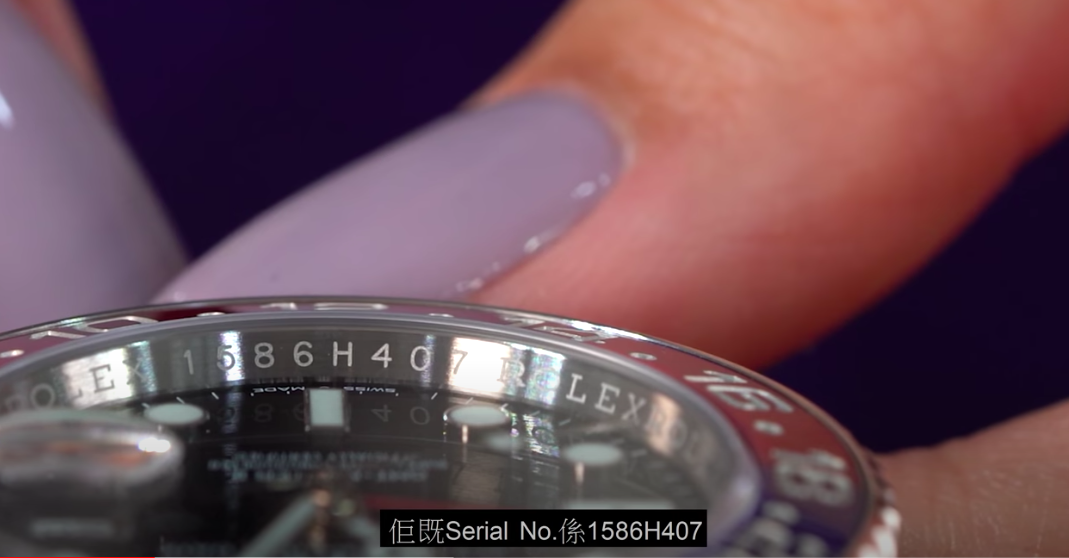
Having the inner engraving is not enough! If you look clockwise, you will see there are five characters made up of "Rolex". Please note carefully that the spacing of each letter is neat and consistent. Also, if you look at the distance between each group of “Rolex” letters, they're all the same.
【3rd Tip】Check the laser imprint on the glass
Since 2002, Rolex has engraved a very small crown logo (see Figure 5) at the 6:00 position on the watch glass. You may not be able to see clearly with bare eyes. You can use a ten-fold magnifying glass.
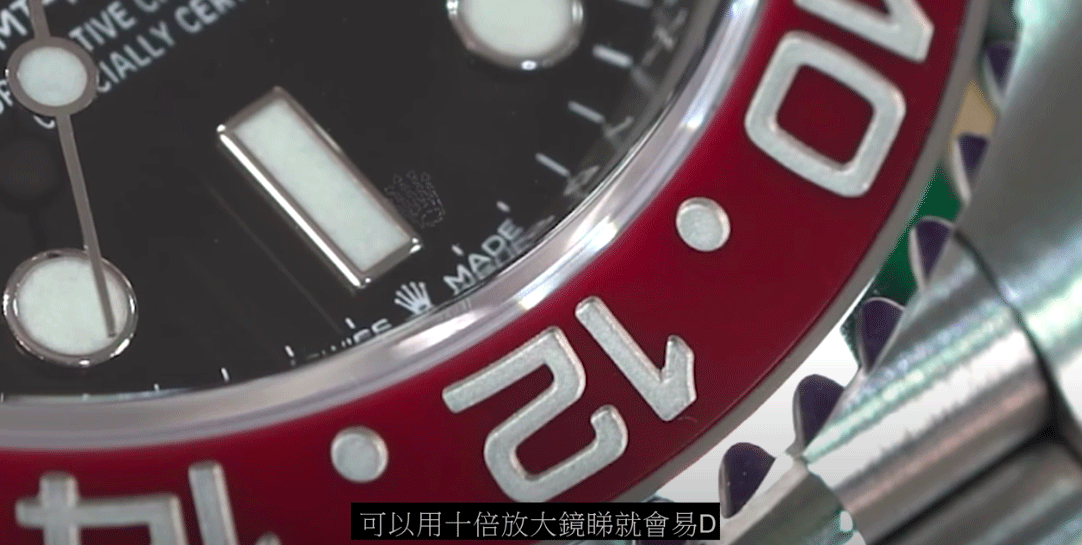
Seeing the crown laser logo is not enough! In fact, this is not a solid pattern, but made up of little dots. The five large dots on the Rolex crown are actually made up of seven small dots!
【4th Tip】Check the bezel
If your Rolex belongs to the GMT series, “GMT” will be engraved on the bezel. If you look carefully, the English words on the surface are all the same font. The distance of each word is consistent and neatly engraved on the surface. Take a look at the pointer: the hour hand resembles the Benz logo design (see Figure 6); the minute hand and the red one are also carefully polished.
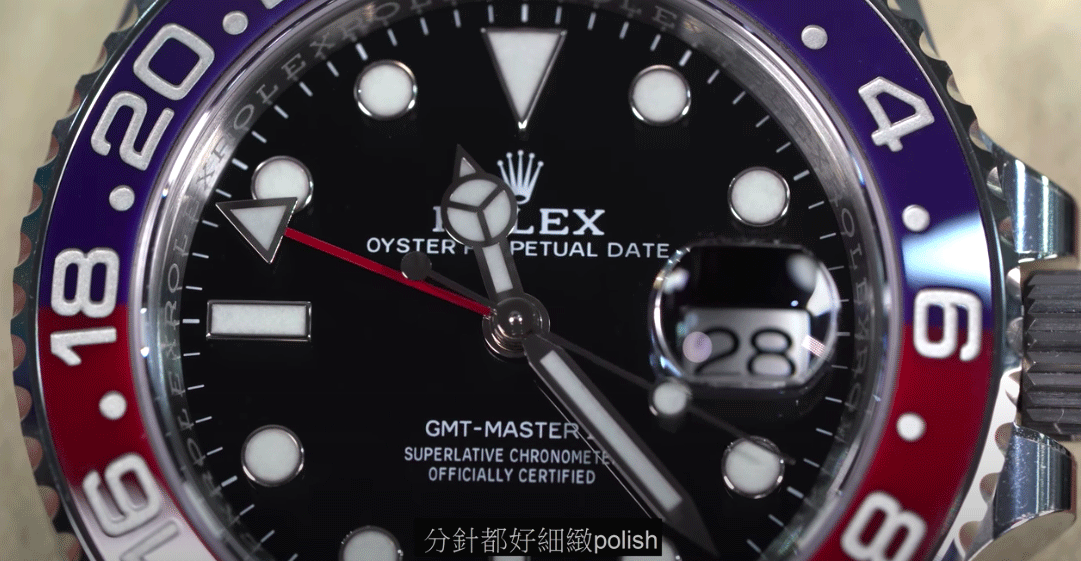
If you look at the hour scale, it's filled with fluorescent material, so that you can see the time clearly in the dark. Fluorescent material is evenly filled on the scale. You can never see any out-of-bounds marks!
【5th Tip】Check the strap
Buckles and straps are also important. Jubilee and Oyster bracelets use the same buckle.
The first buckle is engraved with the crown symbol with five small dots on it. Open the buckle and you'll see the Rolex Logo inside, with words “Geneva” and “Swiss Made” on the right. Corresponding material used is engraved on the other side. If it’s a steel band, “steep” will be engraved. There is a small logo “Rolex SA” on the bottom.
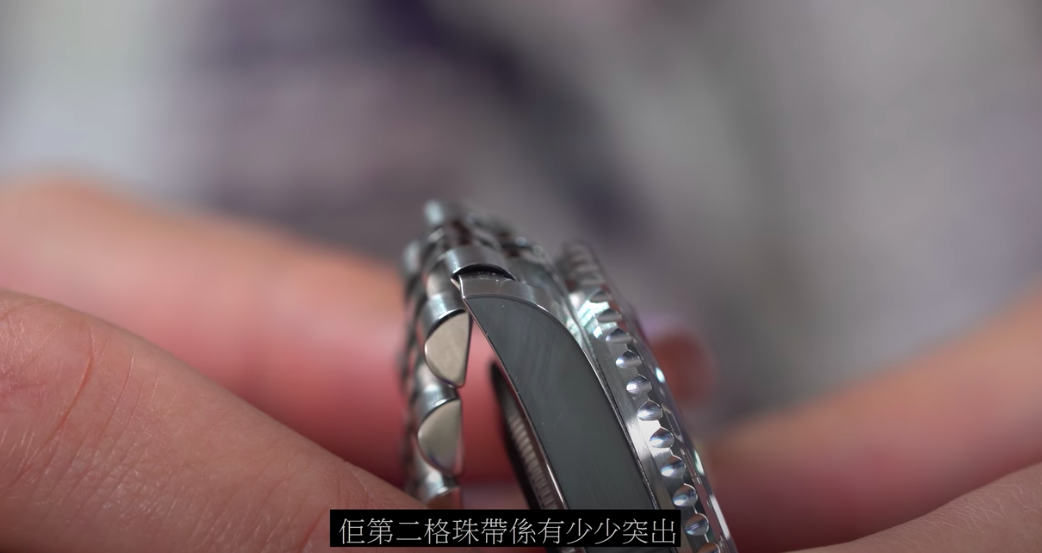
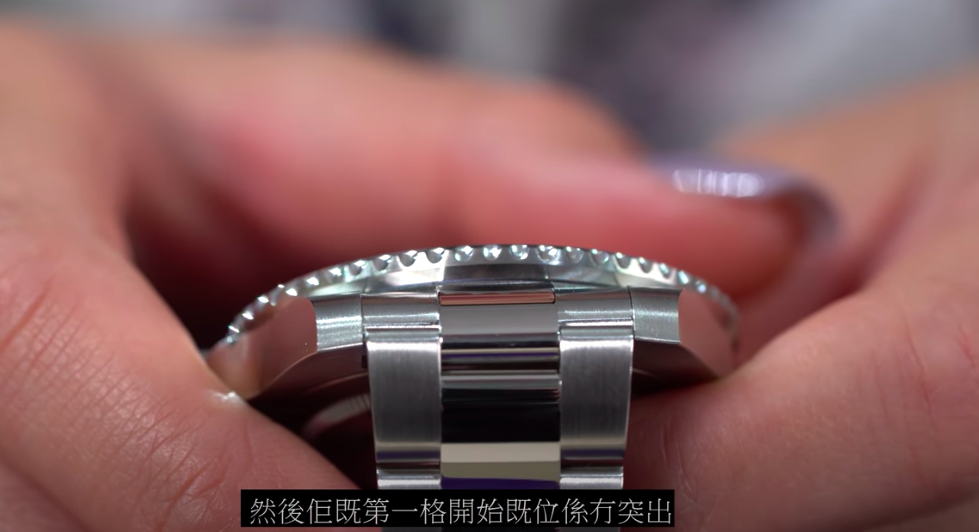
Take a look at the Jubilee bracelet first: there is no gap between the strap and the bezel. There are very few protruding parts in the second grid (see Figure 7), and the protruding spacing on both sides is the same. The design of the watchband is also very smooth. Next, look at the Oyster bracelet: its joints are also very smooth, and there is no crack in the connection with the bezel. Unlike the Jubilee, the beginning of the first grid is not protruding (see Figure 8).
【6th Tip】Adjust the time
Unscrew the crown first, and wind the watch. Pull the crown out. For a GMT watch, this position is for hour hand and date adjustment. The date will change after 12:00. Pull the crown out again. This position is for minute hand adjustment. While adjusting the minute hand, the GMT pointer will move simultaneously. You can see that the movement of the pointers is very smooth. In addition, the date will jump to the next day when the pointer is 5 minutes earlier and after the 12:00 position. A buffer of 5 minutes is set.
Lastly, here is a friendly reminder for all. If you want a safe trade, you should go to a reputable shop, or consider going to the service center.

